 |
 |
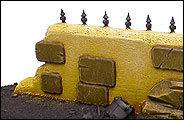
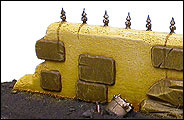
Orks rarely think defensively. They're more for mobbing the Boyz up and running full speed at the enemy. However, a cunnin' Greenskin boss will position his walls in such a way as to maximize his force's defensive firepower, such as his kannons and lobbas!
Rick Smith of the US Web Studio illustrates how he made this Ork Wall from start to finish. He walks you through a step-by-step guide on how to make this piece of scenery.
STEP 1 |
Check to make sure that all the foam has been covered by paint (the aerosol dissolves foam). Prime the entire piece of scenery with Chaos Black Spray Primer. |
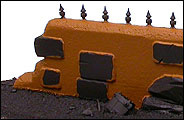   |
|
STEP 2 |
Basecoat the walls with two coats of Vermin Brown. Leave the bricks black for later. |
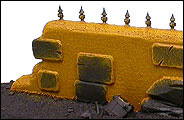
STEP 3 |
Heavily drybrush Leprous Brown over the Vermin Brown basecoat. |
STEP 4 |
Give the previous coat a heavy drybrush with Bubonic Brown. Use more pressure near the top of the wall and less at the base. If you would like to have an especially bright wall like the one depicted, repaint the very tops of the wall with Bubonic Brown. Don't drybrush this. Paint it straight on. |
   |
|
STEP 5 |
Lightly drybrush the wall with Bleached Bone. Concentrate most of your paint on the upper portion of the wall. |
STEP 6 |
Touch up the "bricks" and rocks with Scorched Brown. |
STEP 7 |
Repaint the metal bitz with Chaos Black. |
   |
|
STEP 8 |
Drybrush Bestial Brown over the Scorched Brown bricks and rocks. |
STEP 9 |
Drybrush Snakebite Leather over the bricks and rocks. |
STEP 10 |
Lightly drybrush Bleached Bone over the bricks and rocks. Do not clean out your brush from the previous colour. |
   |
|
STEP 11 |
Using Tin Bitz, roughly paint anything that would be metal in the random piles of refuse. |
STEP 12 |
Heavily drybrush the metal bitz with Boltgun Metal. |
STEP 13 |
Give all the metallic parts a wash of 4:1 mix of Chestnut Ink to Black Ink and a good deal of water. |
   |
|
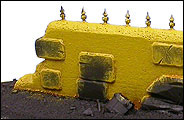
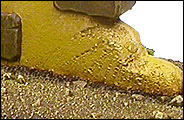
STEP 14 |
To create the appearance of rust streaks, thin the mix down with more water. Paint thin lines down from the plate and the spikes along the top of the wall. Don't overdo it, though. Less is always more. |
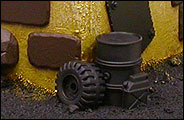
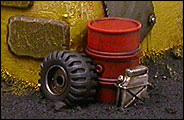
STEP 15 |
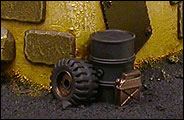
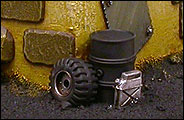
Now, paint all the remaining bitz. Choose suitably Orky colours. I chose Chaos Black drybrushed with Codex Grey for the tires (a no-brainer) and Red Gore highlighted by Blood Red for the barrel. |
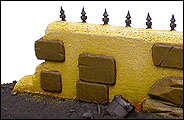
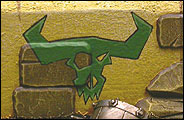
STEP 16 |
Add Orky glyphs if you'd like. The ones shown were first drawn on very lightly with a sharp pencil. Then, I filled it in with Chaos Black paint. The horned skull was painted with two coats of Snot Green with highlights of Goblin Green to pick out the edges. |
   |
|
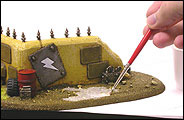
STEP 17 |
Finally, paint the base with the same colours as the bricks and rocks. Basecoat the ground with Scorched Brown. Then drybrush with Bestial Brown, Snakebite Leather, and finally a light coat of Bleached Bone. |
STEP 18 |
If you feel up for it, try adding some static grass and clump-foliage to the base. Add a tiny bit of water to some wood glue and paint it onto the base in patches. Sprinkle the static grass over the glue and reclaim what doesn't stick. Repeat this process until you're pleased with the result, but remember that even though Orks have green fingers, they don't care much for gardening. Keep the foliage sparse and trampled! |
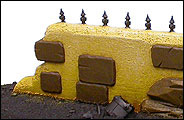
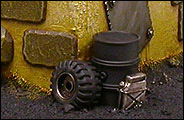
DONE |
That's that with that! Click on the very last image above to see the finished Ork Wall from different angles. |