 |
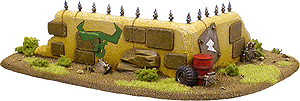 |
Orks rarely think defensively. They're more for mobbing the Boyz up and running full speed at the enemy. However, a cunnin' Greenskin boss will position his walls in such a way as to maximize his force's defensive firepower, such as his kannons and lobbas!
Rick Smith of the US Web Studio illustrates how he made this Ork Wall from start to finish. He walks you through a step-by-step guide on how to make this piece of scenery.
STEP 1 |
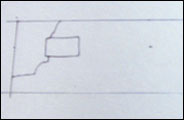
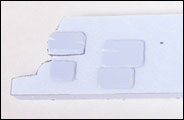
Cut out a piece of Masonite. It can be any shape, but the form will dictate how long or what bends can be made on the length of wall. Use a band saw. If you don't have access to a band saw, use a hack saw or a handheld jig saw. Do not use these power tools if you are young and have no parental supervision. |
   |
|
STEP 2 |
Using 9/16" thick insulation Styrofoam, measure out a wall that is 2" high and 12" long with a felt-tipped pen. Starting from the left side, measure in 7". Draw a line here. This mark will be the corner of your wall. Now, rough out the jagged, broken edges on both the left and right sides. While planning the rough sections of the broken wall, remember to make adjustments for where large blocks may be jutting from the rubble. |
STEP 3 |
Put aside the walls and pick up an X-acto knife and some plasticard. Cut the card into long strips of varying thickness. Now, cut them into small bricks. Round the edges by laying your brick onto a flat surface (not your mother's kitchen table!) and cut downward until the edges are rounded. Now, cut the edges of the brick at a 45-degree angle with small, quick slices. Finally, on only a few bricks, cut out triangular marks for some easy detailing. |
STEP 4 |
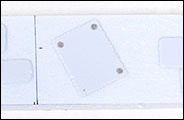
Also using plasticard, make a metal plate to patch a hole in the wall. Cut a larger "brick" and round the edges. Now, using an X-acto, hack into the edge at a 45 degree angle. Flip the card over and repeat this cut back into your previous cut to create a small "V" shape. Find a wheel well from an Ork buggy and cut the bolts off of it. Using superglue, glue these to your metal plate. To create the look of a missing rivet, use an X-acto to drill down into the plasticard. |
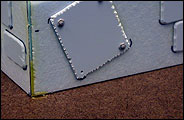 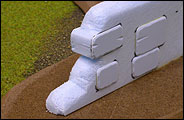  |
|
STEP 5 |
Now, assemble the wall. Using the X-acto knife, cut the wall in half. Now, cut a triangle out of each wall to form a corner (remember: This is an Orky wall. What Ork would worry if his wall was a perfect 90 degree angle? This one sure didn't!). Use your finger to apply a thin layer of woodglue to the wall corner joint. Press these together and apply a layer of glue to the bottom of the wall. Glue it down to the Masonite base. Also at this juncture, attach your bricks to the wall in their
proper places with more wood glue. Let everything dry completely – this
may require an hour or more. |
STEP 6 |
With a sanding block or fine piece of sandpaper, sand the harsh corners into smooth rounded edges. If there are any plasticard bricks that hang over the crumbled edges of the wall, take care not to sand these areas. |
STEP 7 |
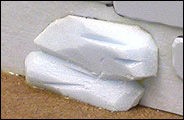
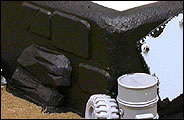
With two small offcut leftovers of foam, use the X-acto knife to hack the shape of a rock into four of their six sides. Two sides must remain untouched so that it will lay flush against the wall and the Masonite base. Use more woodglue and glue these two rock halves opposite each other on each side of the wall. |
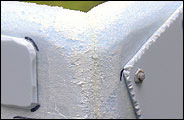   |
|
STEP 8 |
Once everything is completely dry, use the sanding block to smooth down the sharp corner of the wall. If there is still a gap from where the joint meets, use some spackling to fill in the opening. |
STEP 9 |
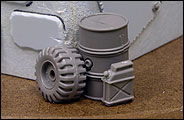
Now, gather together all the Orky bitz you can find. Barrels, engine blocks from Ork buggies, gas cans, tires... all sorts of detritus. Glue these down to the Masonite base with superglue. Pile them up if you'd like. |
STEP 10 |
Texture the wall with paint. It doesn't matter what colour is used, but lighter colours make it harder to see where the brush has been. Try to keep the paint away from the metal plate and the plastic bits. The first coat should seal the foam. Make sure that every Styrofoam surface is covered. This seal will safeguard the foam against melting when the scenery is primed with spray primer. The second coat will texture the foam. When painting this second coat, apply the paint with the side of the brush. Do not thin the paint with water. The paint must be thick to retain the brush texture when applied to the wall. |
STEP 11 |
Flock the base with sand, small stones, and woodglue. Allow it to dry thoroughly. |
STEP 12 |
Finally, add spikes to the wall with a little bit of wood glue (the spikes shown on the following page were taken from the old Ork Battlewagon kit, but you can easily make shards of metal as described for the steel plate.) |