| STAGE ONE |
|
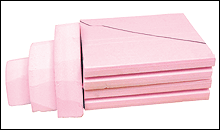
| Stack three 2" square foam squares on top of each other. Cut
out three semi-circles of decreasing size out of insulation foam. Use
white glue (or Liquid Nails) to stick all the pieces together as shown
above and glue the assembly to a hardwood base. |

|
| |
| STAGE TWO |
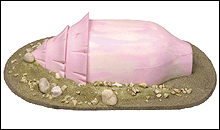
| Shape the pieces with a sanding block until you create a nice organic
shape. Use the photos to the right as guides. Cut cracks into the prow
of the spore with a hobby knife to represent fractures in the chitinous
plates which split upon impact with the planet’s surface.
|
| |
|
| STAGE THREE |
|
| Detail your spore’s base with a combination of insulation foam
cut offs, rocks, spackle, and Liquid Nails. You can build up “earth”
around the front and sides of your spore to represent the point of impact.
This ploughed-up earth can also be used to hide any gaps in your spore.
When the spore and base are dry, paint the entire piece with Chaos Black.
Brush the paint on, as spray paint will eat into the foam. |

|
| |
| STAGE FOUR |
| Drybrush the spore’s base with Dark Flesh, then Bubonic Brown,
and then Bleached Bone. Of course, you can use different colours if you
like. Many players like to use colours that match those on the surface
of their gaming table.
|
| |
|
| STAGE FIVE |
|
| Paint the spore in two parts. Basecoat the prow with Bestial Brown
and drybrush with Bubonic Brown. Streak the front with Bleached Bone and
then with Skull White to give the prow a bony, armoured look. |

|
| |
| STAGE SIX |
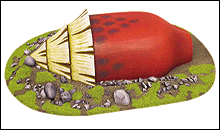
| Basecoat the cargo area with Scab Red and then drybrush with Blood
Red followed by Fiery Orange. As a finishing touch, stipple the top of
the cargo area with Chaos Black and then Liche Purple. Apply wood glue
to areas of the base and sprinkle static grass over top. Once your glue
dries, you’re ready to game with your large mycetic spore!!! |


