IMPERIAL DEFENCES - BY MARK JONES
Resident scenery designer, Mark Jones explains how he went about creating the Imperial defence blockades featured in Codex: Imperial Guard.
Resident scenery designer, Mark Jones explains how he went about creating the Imperial defence blockades featured in Codex: Imperial Guard.
|
| Mark Jones |
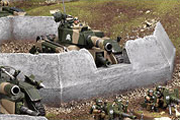
Mark: Defence lines in the 41st millennium are the products of the massive forge worlds that supply arms and munitions to the Imperium’s combat forces. Prefabricated sections of manufactured barricades are transported to the front line, where they are placed at the disposal of Imperial Commanders. The pieces are set in place by the Imperial Guard and then partially buried. A cunning Commander will position the parapets in such a way as to maximise his force’s defensive firepower.
The set of defences that can be seen in Codex: Imperial Guard is based on a simple design that was easily adapted to produce a number of variations. For instance, polystyrene sheet was added to alter the height of the parapet and sections of card wall were cut away to make space for artillery. Also, due to the modular nature of the terrain set, it could be set up to produce a huge number of different layouts.
All the defences were made using a set of templates. There are two sets of templates with the walls attached on either side of the base. Regardless of which one you choose to make, the same methods apply; they are just different templates. Follow these instructions and have a go at making a set of defences.
The defence templates can be downloaded below:
Imperial Defences Template 1: [Download
PDF 537 Kb]
Imperial Defences Template 2: [Download
PDF 525 Kb]
![]()
THE FLOOR AND WALLS
|
|
|
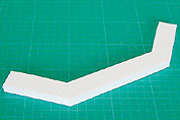
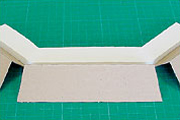
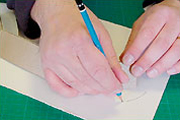
Once you’ve printed out your templates, begin by cutting out the base template. Place it on the foam board and trace around the outline. Using a metal ruler to keep the lines straight, cut out the shape with your modelling knife.
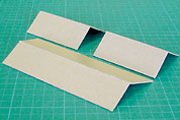
Cut out the wall templates and trace the outlines onto thin card. Remember to draw the dotted score line onto the outlines you’ve traced. Cut out the wall shapes and score along the dotted line with the back of your modelling knife. Fold along the scored line before taping the walls in place on the base.
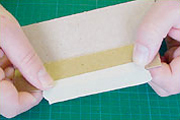
Starting with the middle wall, apply a piece of tape to the bottom edge, leaving half the tape free to attach to the base. Place the wall against the base and fold down the rest of the tape to attach the pieces together.
|
|
|
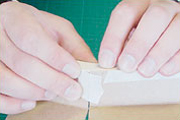
Using the same methods, tape the left and right walls on either side of the middle wall.
To complete the parapet, the middle and outer walls need to be taped together.
One at a time, line up each of the short walls with the long middle wall, and apply tape to both halves of the walls to hold them in place.
|
|
|
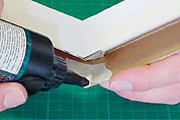
To further strengthen the model, apply white glue to the inside of the joins.
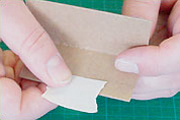
Trace each end of the walls onto card. Cut out the triangles and try to fit them in place without any tape. This is so you can see if they are the right size and is called a test fit. Once you are happy with the shape, tape them inside. Now it is time to make a base for your model.
BATTLE DAMAGE
|
|
|
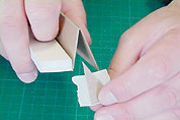
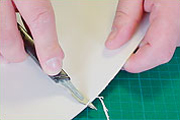
To create the appearance of battle damage, carefully cut away small sections of the upper wall with your modelling knife. Make these cuts uneven and random – this will create a more natural feel. Drill holes in the card with a pin vice to simulate hits from small arms fire, and then rough up the edges. Ensure that you make this battle damage nice and deep so that a coat of textured paint won’t obscure it.
BASE OF THE DEFENCES
|
|
> |
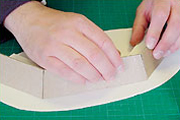
To make the model’s base, draw an outline around the wall section onto the thick card. Draw the outline roughly 25mm from the edge of the walls. Cut out the shape.
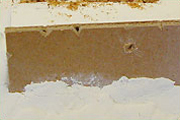
To create a natural bevelled edge to the base, hold your knife roughly at a 45° angle and slice away the square edge.
Now that the base is finished with its bevelled edge, glue the completed parapet to it. Set the model aside to dry.
FINISHING, TEXTURING AND PAINTING THE DEFENCES
|
|
|
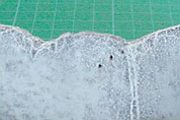
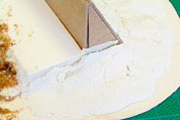
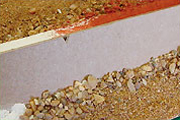
Use ready-mixed filler to blend the walls into the base and fill in any gaps. Once dry, smooth the edges down with sandpaper.
Glue sand and gravel to the base of the walls to give the appearance of the defence having been buried. Paint the walls of the defence with textured paint. You can buy this from home improvement stores or make your own by mixing together emulsion and sand.
To paint the finished model, begin by undercoating it Chaos Black spray. Drybrush the wall Dark Flesh, followed by Codex Grey and finally a lighter drybrush of Fortress Grey. Paint the ground a basecoat of Bestial Brown, followed by a drybrush of Vomit Brown. Finish off with a light drybrush of Bleached Bone.
To complete the model, paint white glue onto the base of the defence and apply flock.
DEFENCE WORKS
|
|
|
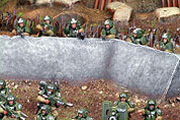
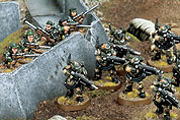
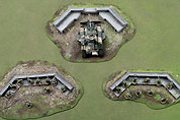
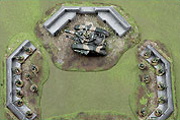
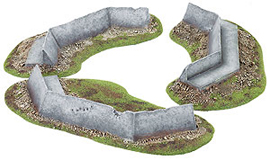
As these defences are so easy to build you can make a whole system of barricades in no time at all. Not only that, but with a little imagination each one can have a unique design. For his set of terrain, Mark made all sorts of alterations to the models.
He raised parapets by adding extra layers of foamboard, whilst one model became an emplacement for a Leman Russ. To accommodate the tank, he raised the walls on 25mm polystyrene foam and cut a section out of the wall. Finally he used the defence as the starting point for a tall guard tower. Here you can see just a few of the different defence layouts you can create with a full set of this terrain, in the same way as an Imperial Commander will plan his defences.