
|
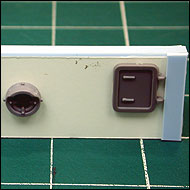
Before starting, you'll need to gather some supplies and tools to build your walls. Don't worry if you are missing a few things, because you can always try to improvise with the materials you have at hand.
 |
 |
 |
Step One |
Step Two |
Step Three |
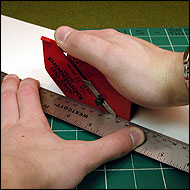
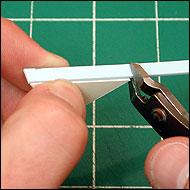
Gather up some of your foamcore and a cutting instrument. If you have the luxury of owning a foamcore cutter, then these steps will go by a bit easier. A foamcore cutter or mat cutter is basically a sharp blade fitted into a frame that produces excellent 90- or 45-degree cuts through foamcore. This precision helps out quite a bit when you piece together our creation in the next step. However, this tool is not entirely necessary. You can achieve a good, clean cut through foamcore with a sharp blade and careful, precise cuts. Like always, watch your fingers and if you are too young to use cutting tools like these, please ask your parents for help.
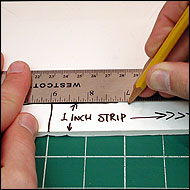
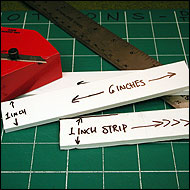
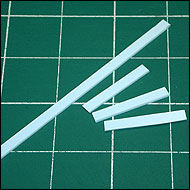
You can make each defensive wall whatever length you choose – just be sure to stick to one universal height for each of your sections. In our example above, we made a pair of 6"-long, 1"-high wall sections. First, cut out the wall section itself. Measure out a 12"x1" rectangle. You'll need a sharp pencil tip to make an accurate line, so keep a sharpener handy if you plan to do more than just a few wall sections. Now, cut this rectangle out of the foamcore. Next, cut this 12" piece in half to make two equal 6"x1" rectangles. Take your time and make each cut carefully. If you rush through these steps, your walls will not fit together right, and you'll just have to start over anyway. Do it right the first time! Set these rectangles aside and move on to the tricky part of cutting out the supports.
 |
 |
 |
Step Four |
Step Five |
Step Six |
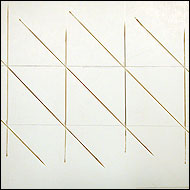
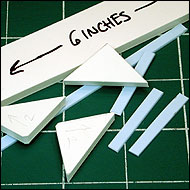
With the pencil, draw out another rectangle in the middle of some foamcore, this time at 6"x1"(don't cut just yet). The length will vary depending on how many supports you need. The longer the rectangle, the more supports you'll require. Now, starting at one end of the rectangle, mark off 1" lines along the length of the rectangle to create 1" squares. Keep in mind that each square will yield two supports. The two 6"-long wall sections in our example each require three supports, so we drew three squares.
You should now have a long rectangle with a bunch of lines running through it in front of you. Take up your cutting tools and begin cutting diagonally across each square you drew. You should not cut anything free of the foamcore just yet, and for good reason. Making small cuts in foamcore is very difficult if there isn't much material to grip and hold everything steady. Thus, try to keep everything together on a big sheet until the final cuts.
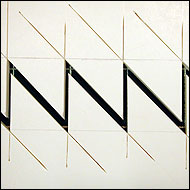
Next, make vertical cuts along parallel edges of each square like the picture above. When you are finished with these two types of cuts, you'll be able to separate the foamcore into two halves that sorta look like jagged teeth. All that's left now is to free the triangular "teeth" by cutting along the length of the original rectangle.
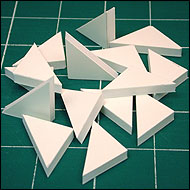
During this whole process, you really need to be careful and make your cuts count. Accuracy is crucial, as you want all the pieces to line up nicely! Gather up your pile of lovely little support triangles and put them aside – it's time to cut out the final bits.
 |
 |
 |
Step Seven |
Step Eight |
Step Nine |
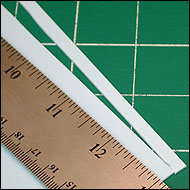
Dig up a sheet of plasticard or thin cardboard (a cereal box will do). Measure out a 3/8"x10" rectangle along one edge. The length of this strip will vary depending upon how long your wall is and how many support triangles it contains. For our 6" wall example, about 10" of card is right. Carefully cut out this thin strip. You will use this material to cover any bare foamcore and to serve as cosmetic detail. Continue cutting out strips for each defensive wall you wish to make.
Now, cut each strip into appropriately sized bits that you will glue along the walls. To size each bit accordingly, hold your 3/8" strip along the top edge of a wall section to determine how long it should be (in our example, 6"). Cut the strip at this length. Do the same for each triangular support along its long edge, which should be a little over 1" per support.
 |
 |
 |
Step Ten |
Step Eleven |
Step Twelve |
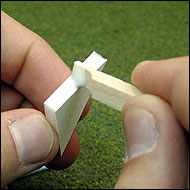
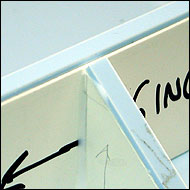
Separate out a wall section and three triangle supports from your pile of cut-up bits. Place the wall on a flat surface and try lining up the support triangles against the wall. Test out different pieces and flip the triangles around until you have a set that works together to form a wall with three supports. If you are doing a bunch of defensive walls at once, it's a good idea to label each set of bits that work well together so that you know which ones go with which wall when it comes to gluing this stuff together.
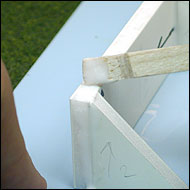
Grab your white PVA woodworking glue and spread some along the edge of a support triangle. Affix each support triangle to the wall using firm pressure and the power of glue. Clean up any excess glue along the edges. Repeat this process for each wall section.
It is a good idea to place your still-drying structures on a piece of paper or extra plasticard. This precaution is necessary as the white PVA woodworking glue will seep down as it dries. Be sure to move the structure occasionally, as you don't want it to permanently attach itself to whatever it's resting on! Allow the glue to set before moving on to covering the foamcore edges.
 |
 |
 |
Step Thirteen |
Step Fourteen |
Step Fifteen |
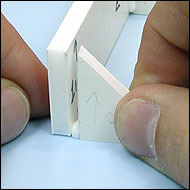
Once things are dry and a bit more stable, spread some white PVA woodworking glue along the top of your wall. Then, grab the 3/8"x6" strip of card and lay it on the glue. Do the same for the tops of each triangular support and be careful to push the plasticard strip up to meet the top of the wall. Do this for every wall section.
 |
 |
 |
Step Sixteen |
Step Seventeen |
Step Eighteen |
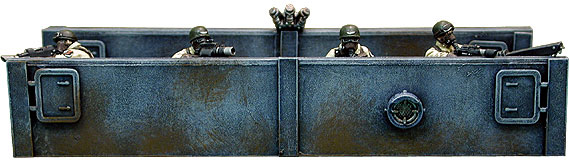
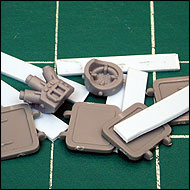
Gather up some interesting bits from your bits box to decorate the wall. If you don't have a vast collection from which to draw, try cutting up interesting designs and shapes from plasticard or thin card and affix them to the front of each wall. If you want to try a patchwork-metal look, cut pieces of plasticard or thin card into rectangles and squares. You can glue these pieces into place all along the front of the wall in a haphazard or orderly fashion. You can also try to add a battle-worn look by drilling a few bolter holes in a row along a wall where you see fit. Finally, you can just leave well enough alone and move on to painting the walls with no extra bits at all.
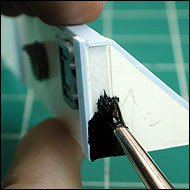
Before you undercoat your terrain with spray primer, be sure to hand paint all exposed foamcore with some Chaos Black paint. Only then can you safely spray the foamcore and paint the piece.
![]()